

How To Build A Makeup Vanity With Drawers
My DIY makeup vanity is finally finished! And I'm excited to share the tutorial details on how to build this makeup vanity!
Originally, I wanted to do an X leg style vanity, but once I started building information technology, the building methods involved started to get a scrap too complex and I like to go along things more unproblematic.
And so, I modified the plans to do an X manner back instead. I do all the same honey how it turned it out despite all the changes and challenges!

A little back story, ever since I started wearing makeup back in my teen years, I ever had a makeup vanity. In fact, I kept the same one for at to the lowest degree xviii years… Hither is a photograph of it:

Note, this post contains some chapter links. For more info see my disclosures here.
Non the most fashionable makeup vanity, only information technology was very functional! When we were getting fix to move back to Charleston earlier this yr I decided to sell information technology since I'd been wanting to build a makeup vanity that was more my mode.
Cost of the DIY Makeup Vanity
My new DIY makeup vanity cost me but nigh $70 in edifice materials! I did splurge on some beautiful, brass drawer pulls which were totally worth it and really elevated the look of this makeup vanity! So, full cost with building materials ($70), paint ($15), and drawer pulls ($24), came to $109 for me!
The final measurements of the DIY makeup vanity are thirty″ alpine 10 36″ broad ten 17.5″ deep.
How to Build a DIY Makeup Vanity:

*3/four″ thick plywood may be used instead, just the panels do have a nicer border stop and the 1 linked to a higher place only needs i cut! Make sure to choice a very straight console board!
**To go on costs depression, I used 2×2 furring strips for the base. Make sure to option very straight boards and boards with minimum cracks. It makes a huge difference when trying to build and finish the makeup vanity.
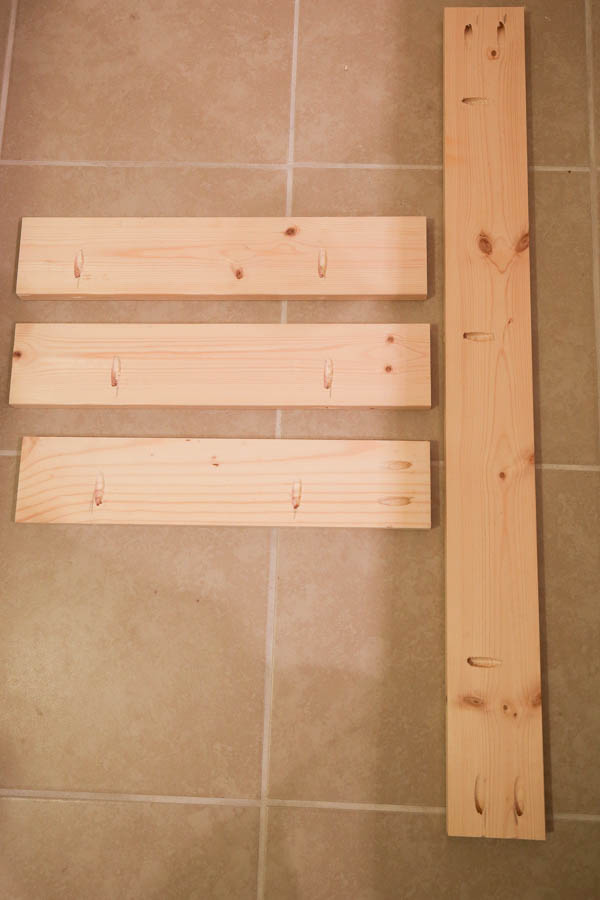
i. Make lumber cuts for the makeup vanity
Click here for the printable build plans of the cut list and building steps!
Use a miter saw and make the following cuts from the two×2s:
- four pieces @ 14 one/two″
- iv pieces @ 25″
- 2 pieces @ 33″
Make the following cuts from the 1x4s:
- 1 piece @ 34 ane/2″
- 2 pieces @ 17 ane/two″
- 1 piece @ xvi 3/iv″
Use a circular saw or table saw and cut the 6ft panel board in half:
- 2 pieces @ 36″
*Note that the panel lath'south bodily width is 17.5″ wide, non 18″ wide (which is the nominal size). If using plywood, cutting two boards to 17.5″ wide x 36″ long. ***Make sure to measure your panel board'south actual width in instance information technology is a slightly different measurement than 17.5″ wide. If that'due south the case, adapt your cuts for that actual measurement!
2. Build makeup vanity top
Add 2 pocket holes along 1 side of each of the 1x4s @ 17 ½″, the 16 ¾″ board, and the 34 ½″ lath. And then, add pocket holes on each end of the 1×4 @ 34 ½″ and on one terminate of the sixteen ¾″ lath.
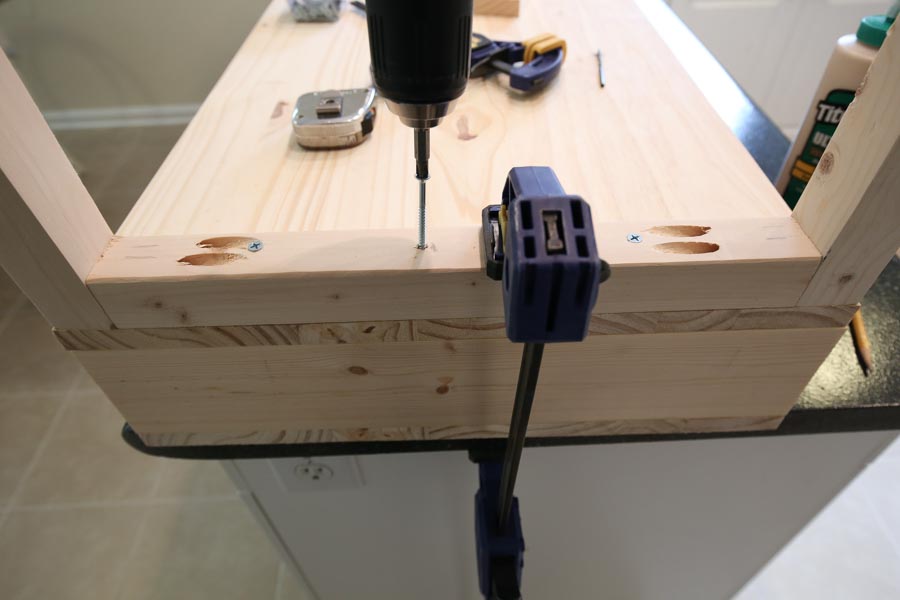
Attach the ii 1x4s @ 17 one/2″ on top of one of the 17 1/ii″ten 36″console boards forth the sides using 1 1/iv″ Kreg screws. So, attach the 34 ane/2″ 1×4 piece forth the backside and to the side boards with Kreg screws (as shown in below photo).
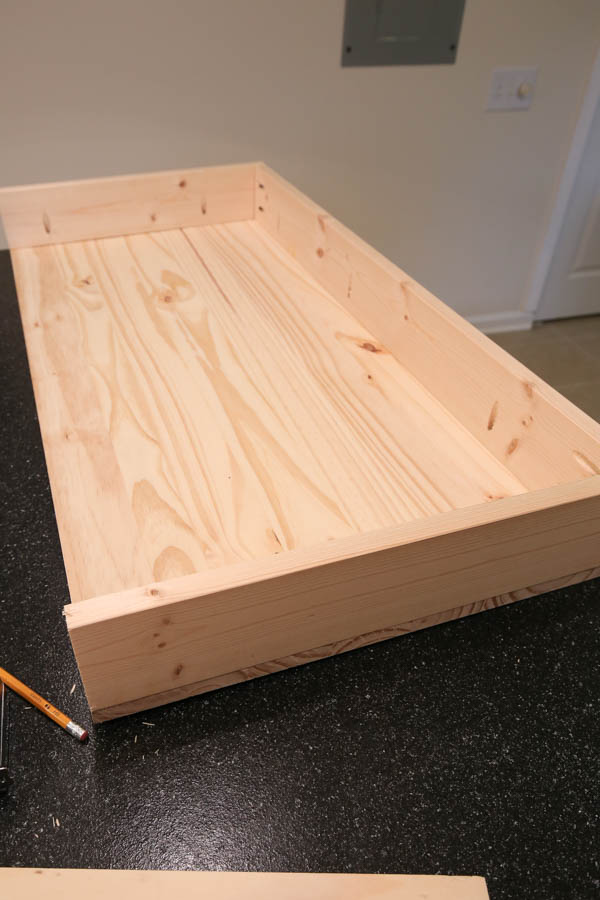
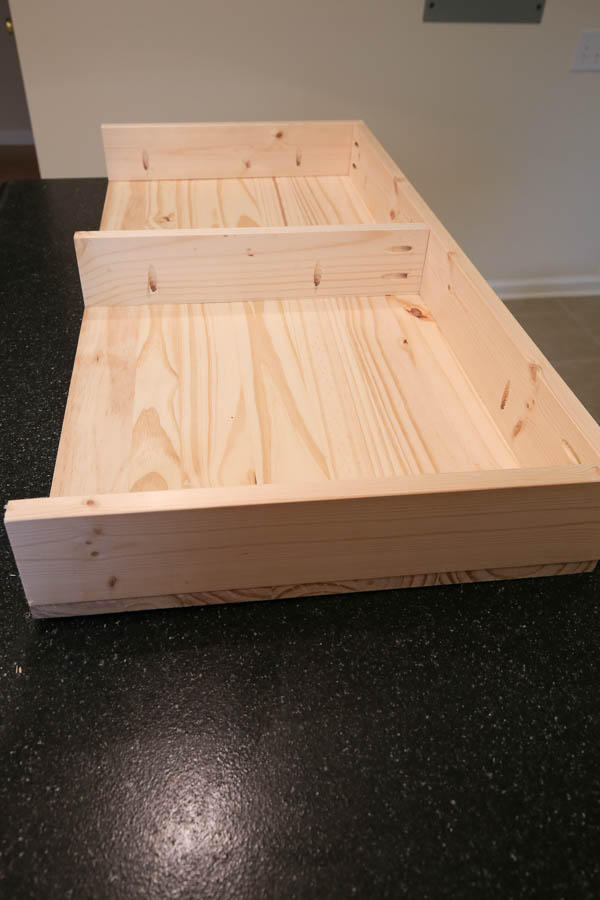
Side by side, add the 16 3/4″ i×4 board in the middle of the panel board using Kreg screws. Notation, it helps to use a clamp to hold it in place while attaching.
3. Adhere drawer slide hardware for DIY makeup vanity
Flip the makeup vanity top over. Information technology'due south time to gather the drawers! This was actually my 2d fourth dimension making drawers. My first time was for my DIY office storage bookcase. Both times I've used these drawer slides which are easier to install compared to other drawer slides I've tried.
When I was outset learning how to build drawers, I followed this drawer tutorial from Shanty ii Chic. I used this method again for these drawers with a few modifications that I volition share below. Definitely cheque out their tutorial so what I prove below makes sense!
***Follow the drawer slide instructions included with your drawer slides for installation. Below are the steps I took to install my drawers. These steps may vary depending on the drawer slides used***
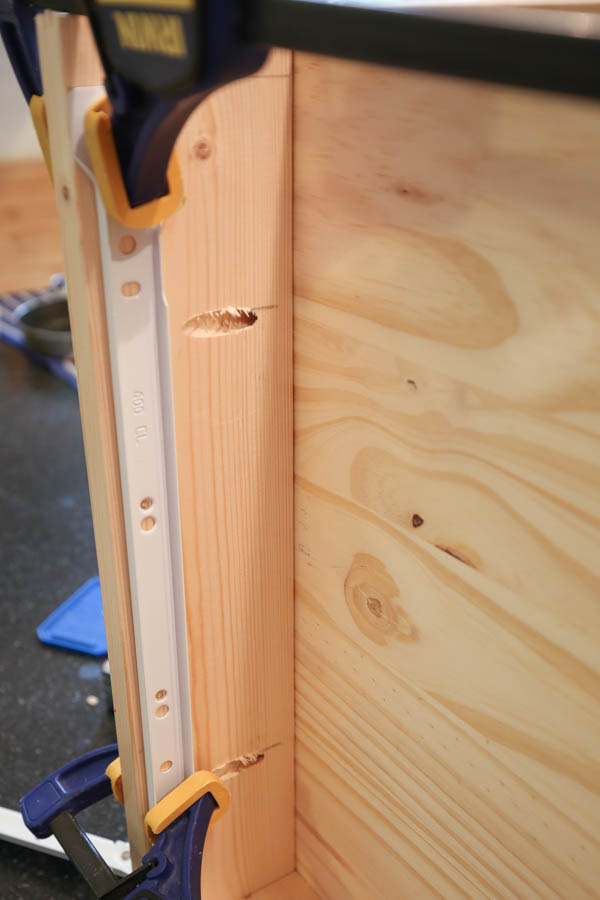
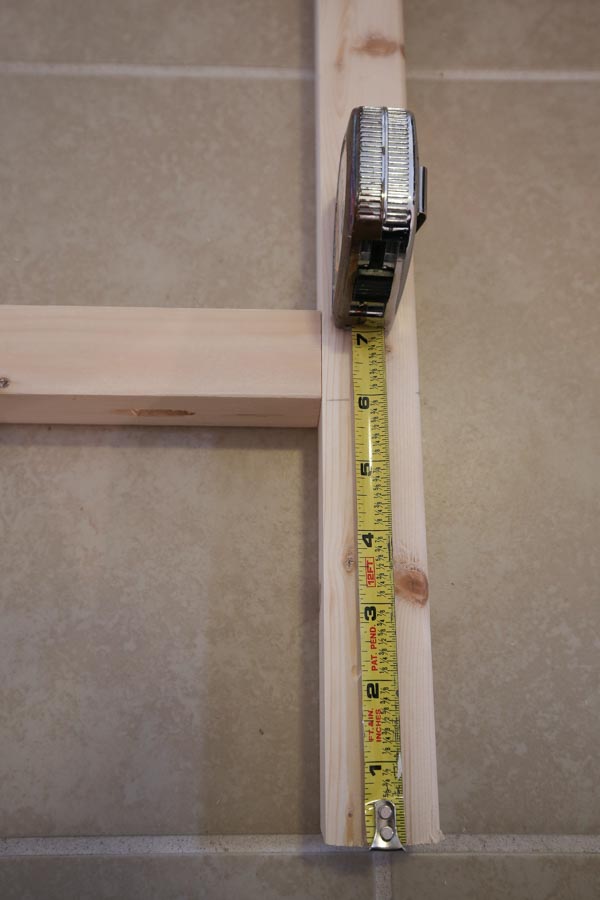
First, use a scrap piece of 1x wood that is flush with the outer edge and draw a line where the inside edge hits the side wood piece. This line is where you will line up the drawer slide to as shown in the below photo.
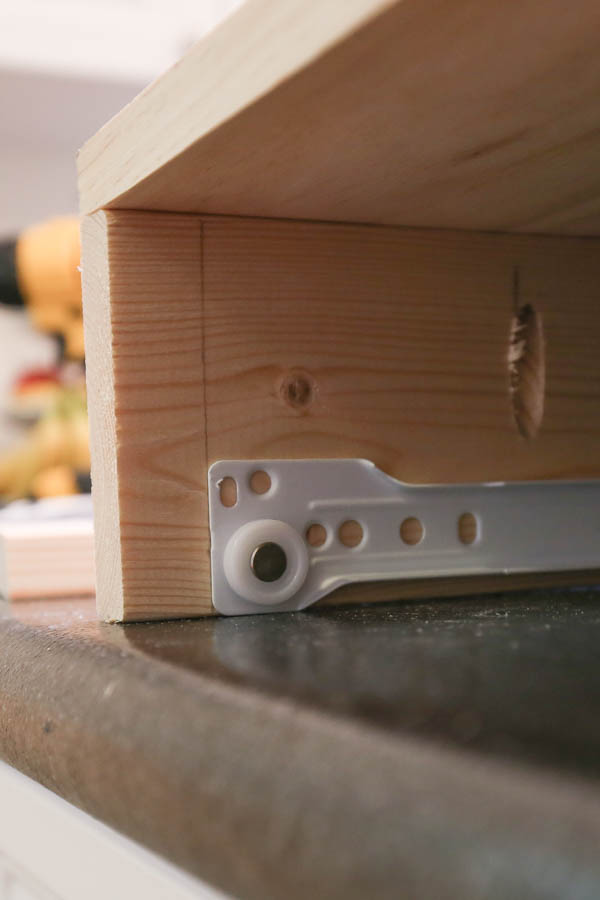
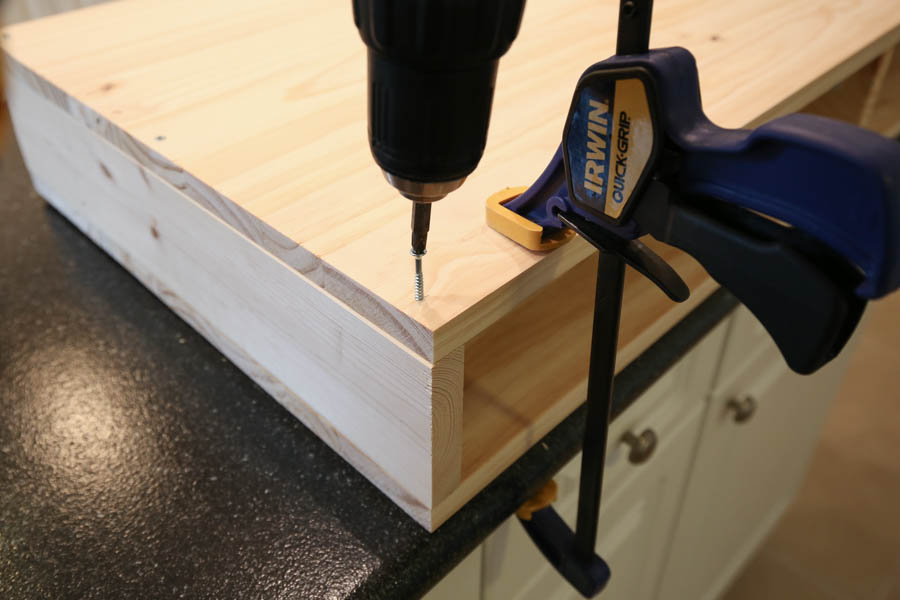
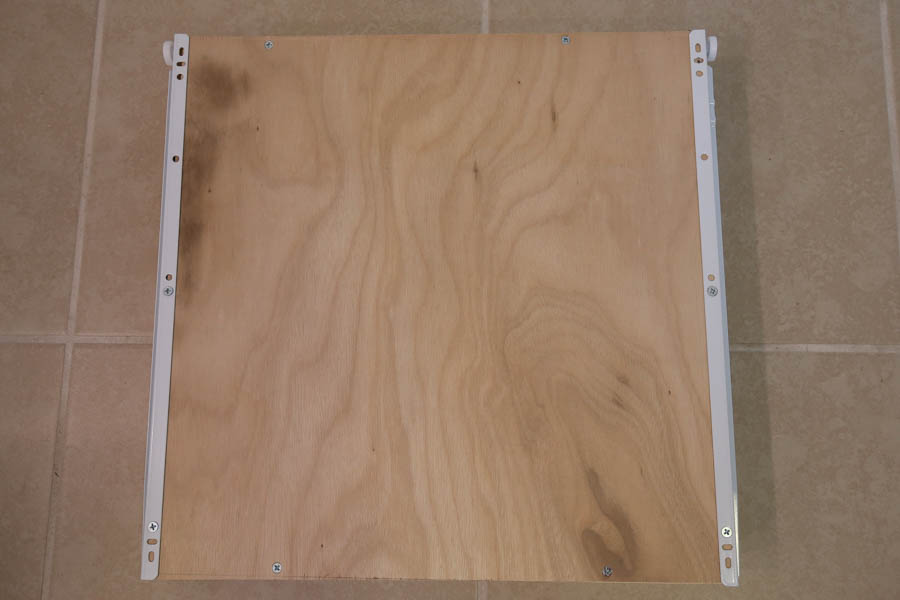
Clench the beginning outer drawer slide in place on the left side. It helps to turn the vanity on its behind for this office. So, drill iii pilot holes at the front, heart, and dorsum.
Adhere drawer slides with a drill and the included screws.
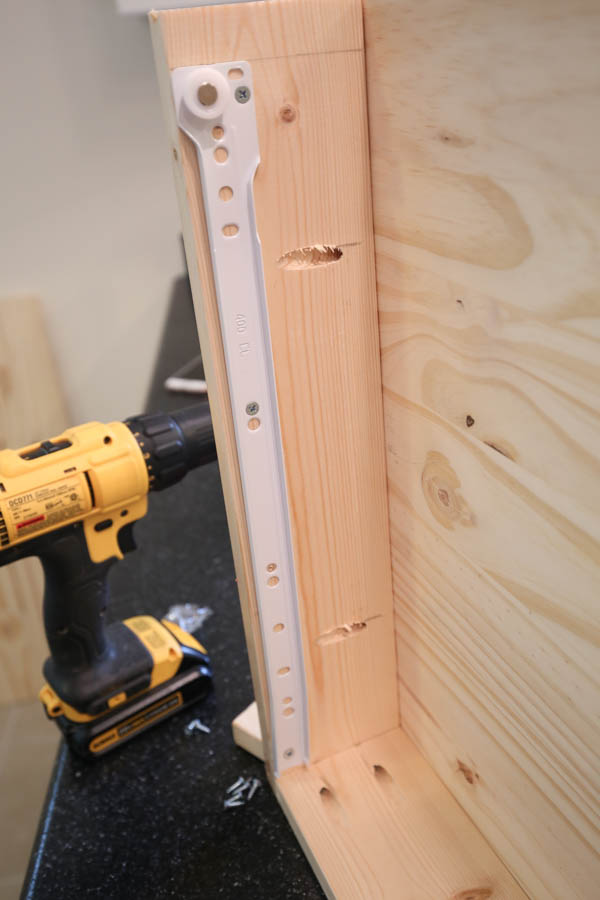
Repeat on the other sides so you accept all 4 drawer slide outer pieces attached to the makeup vanity. Brand sure the drawer slides are level when attaching!
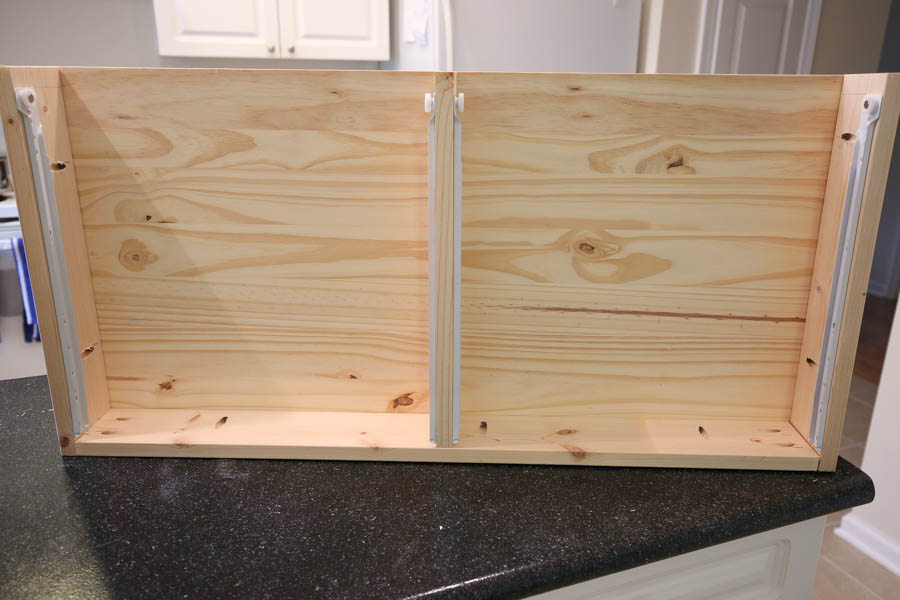
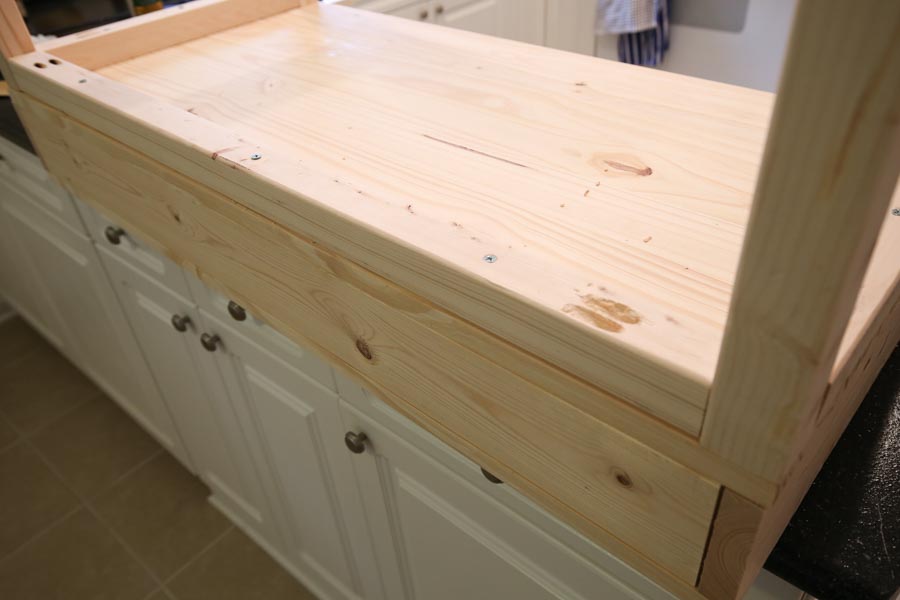
Now adhere the second 17 one/2″ x 36″ forest panel piece on acme of the makeup vanity top to complete the makeup vanity top part. Attach with 1 1/four″ wood screws along the sides and dorsum edge. Make sure to drill pilot holes starting time!
4. Build 2 drawer boxes and add together drawer faces
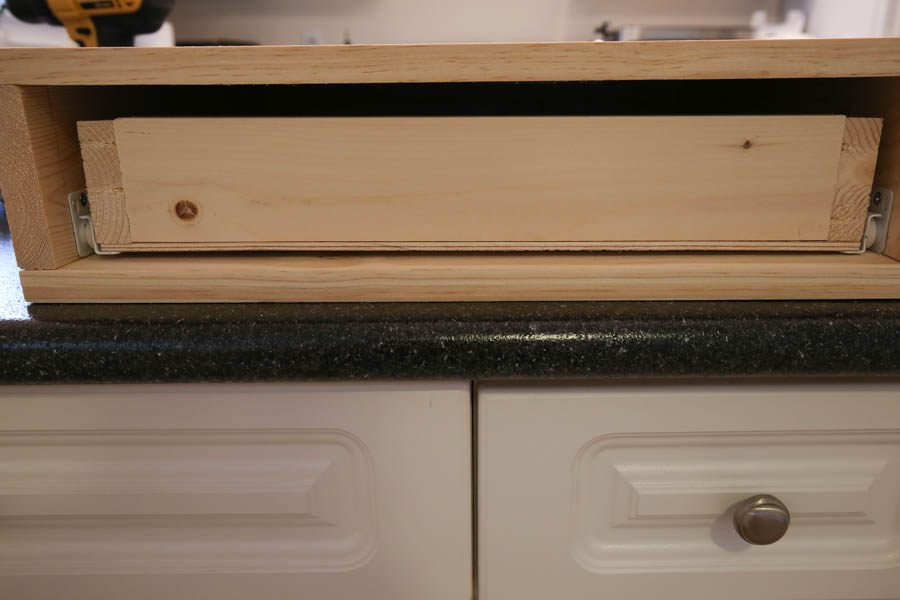
Place the inner drawer box slides on the attached outer box slides. Measure the verbal altitude between the drawer slide pairs equally information technology may vary from my dimensions. Mine was just about 16″ broad. Cut the i/4″ thick plywood board to size for your drawer bottom. The depth should be xv 3/iv″ deep. So, my final drawer box dimensions were xv three/4″ deep x xvi″ wide and that's what I cut my plywood to.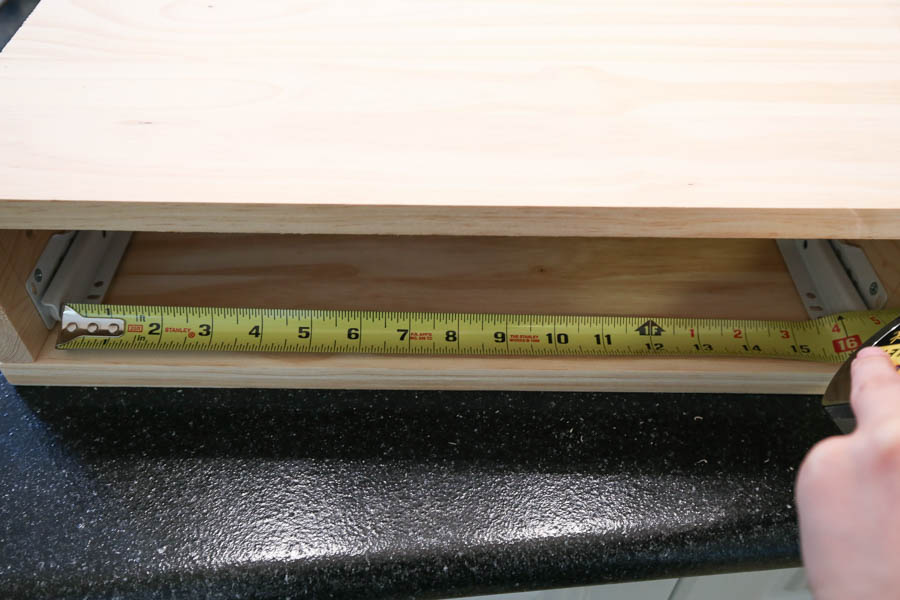
Make sure your plywood board fits in the drawer opening:
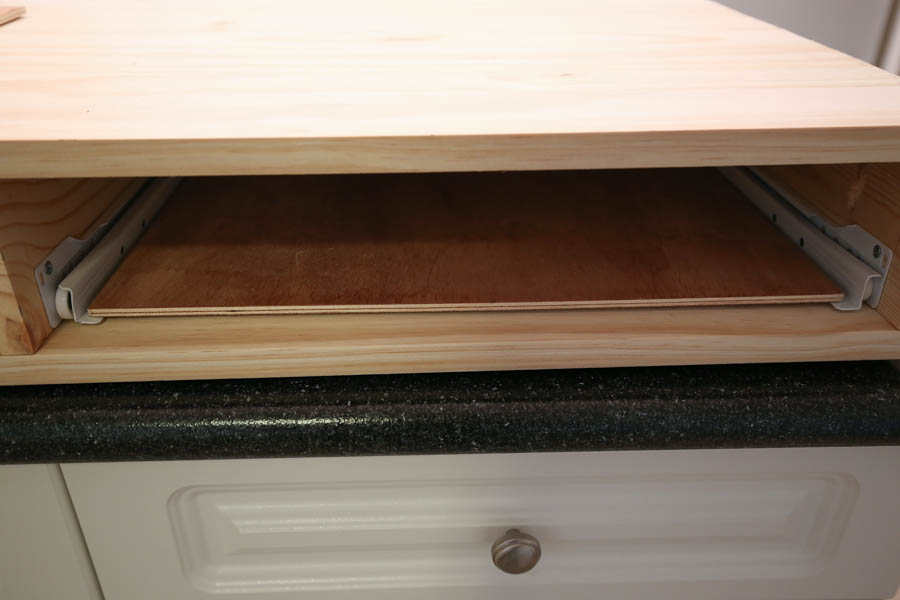
Repeat this process for the other drawer opening equally the dimensions may vary slightly.
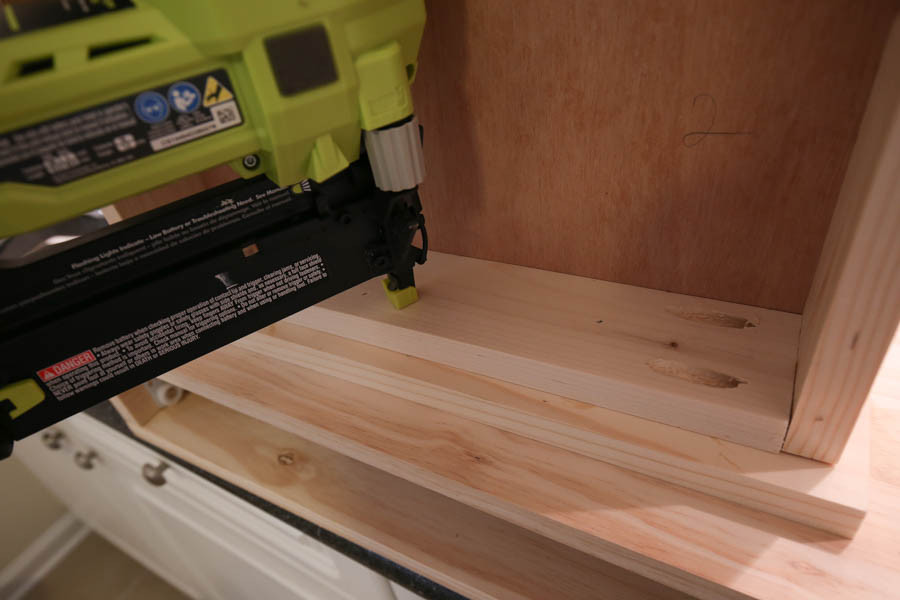
Then, build the drawer box frames to the exact same size equally the plywood drawer bottoms using the 1x3s. Attach drawer box frames together with pocket holes and Kreg screws every bit shown in the beneath photo:
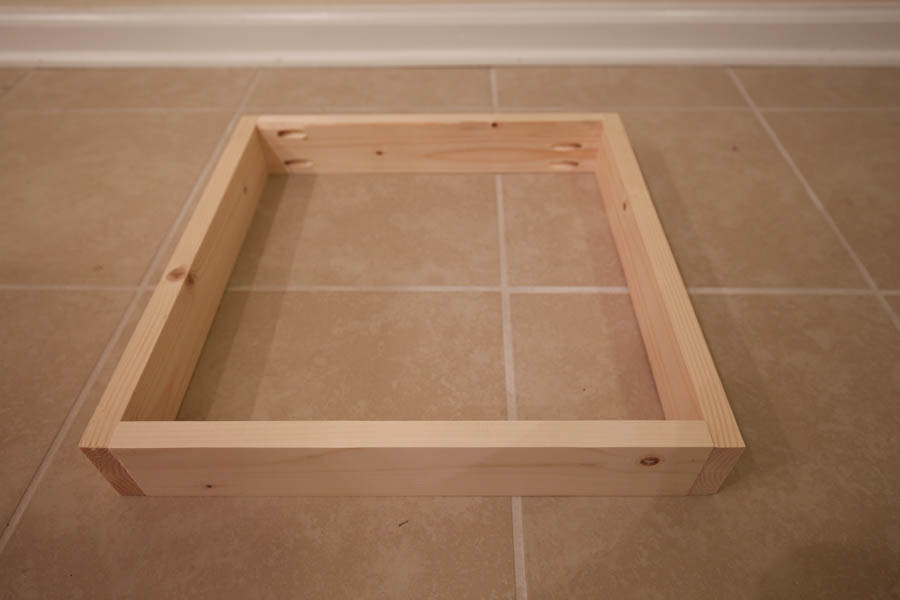
After the drawer box frames are built, adhere the plywood drawer bottoms to them with 3/4″ wood screws (drill pilot holes get-go).
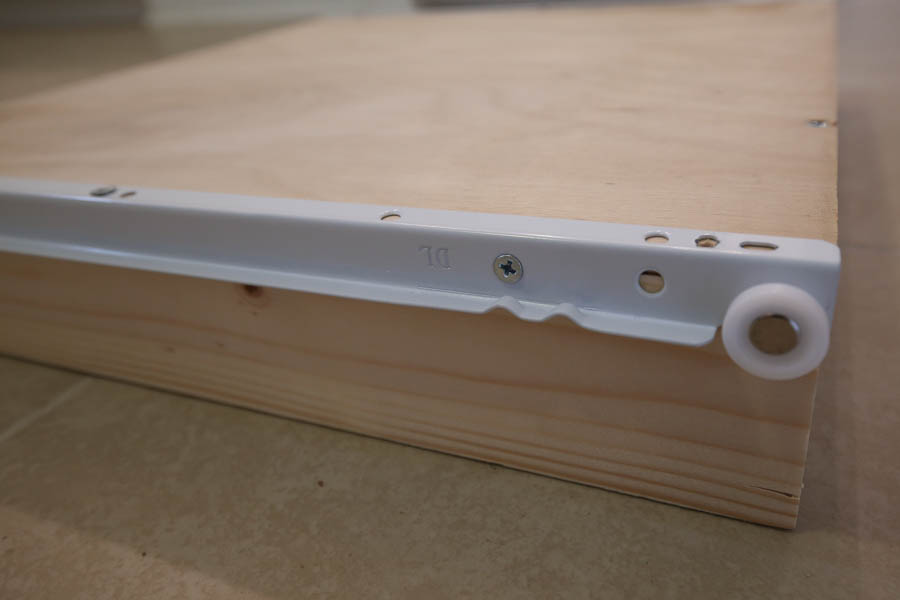
Finally, add the drawer box slides to each side with the included screws. To make my drawer sit properly in the vanity, I had to add a spiral to the forepart and middle of the bottom side of the drawer and then one to the dorsum, side of the drawer box (shown in the 2nd photo below).
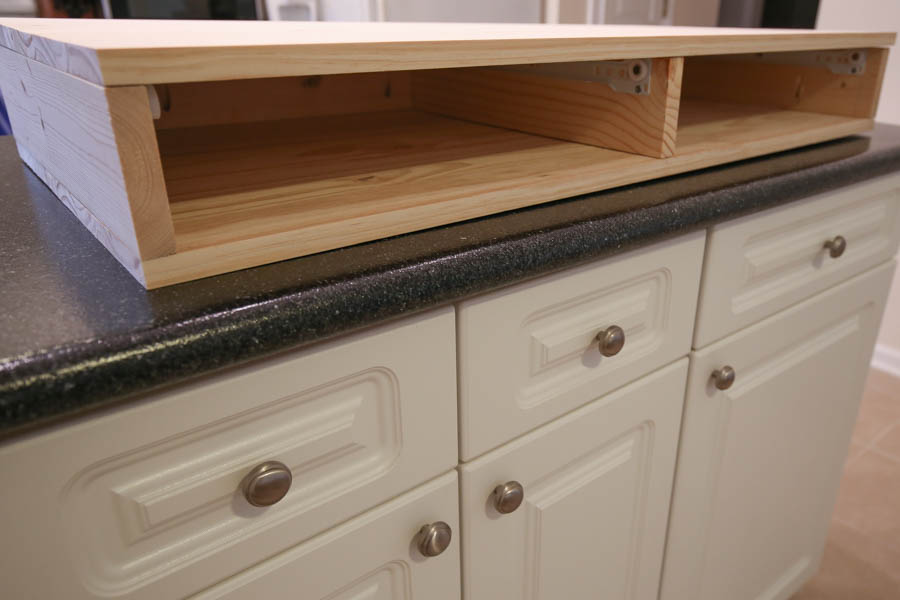
Insert the drawer boxes into the makeup vanity on the slides and ensure they fit properly.
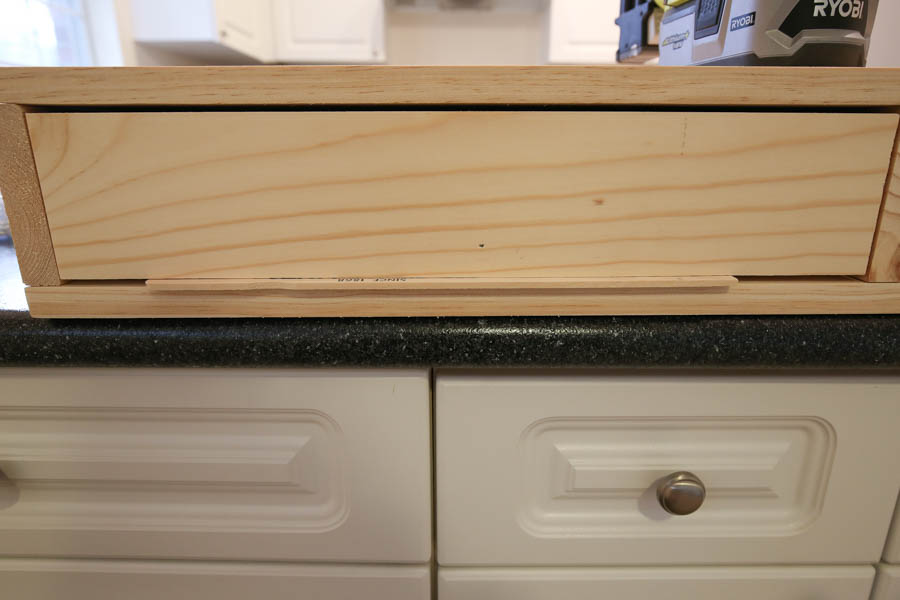
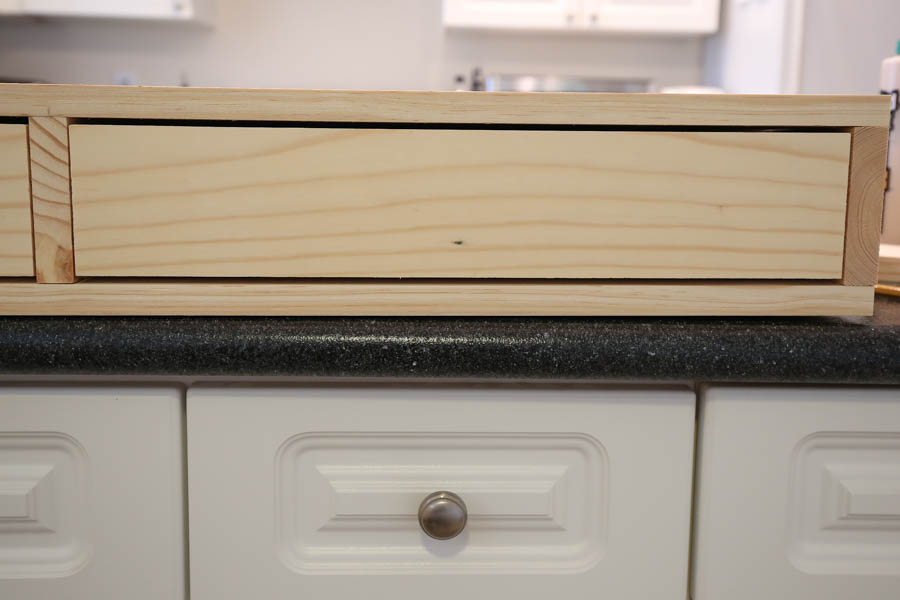
Now it's time to terminate off the drawers with the drawer faces. Utilise a table saw or round saw and straight edge and trim 1/four″ off forth the side of the remaining 1×4 so information technology is 3 1/4″ wide.
Then, mensurate the verbal opening of your drawer opening and subtract at least ane/eight″. This is to determine the length of your drawer face up cut. I don't like huge gaps on my drawer sides, then I just took 1/8″ off, but you lot can do up to 1/4″ if yous want. Cut drawer box faces to size with 3 1/4″ wide wood using a miter saw.
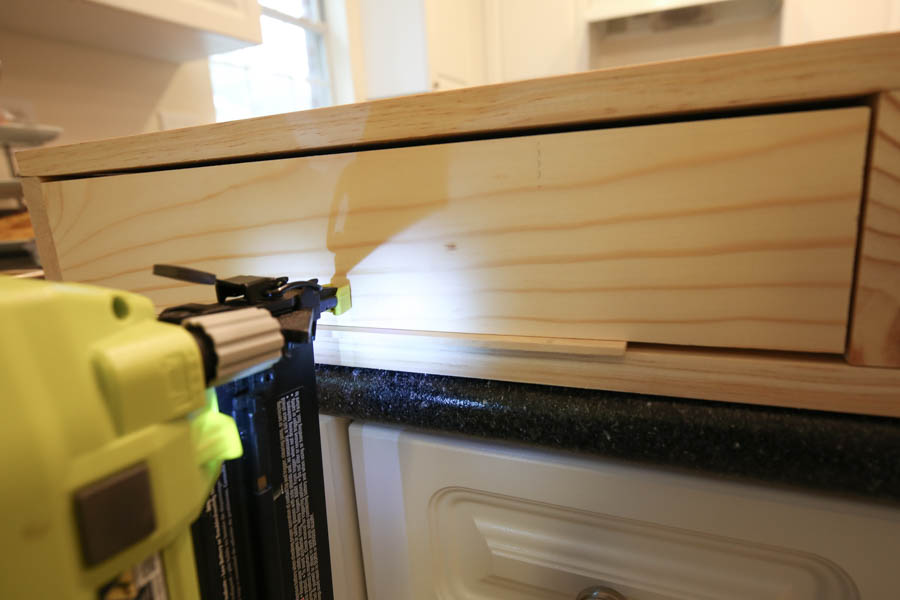
To attach the drawer faces to the frame, I like to use a pigment stir stick (or 1/eight″ wood shim) to make sure my gaps are even and the drawer confront is where I want it.
Then, attach with wood glue and 1 one/iv″ brad nails and brad nailer. I like to practice just one nail in the forepart, and then the other nails from the dorsum.
5. Build the base of operations of the DIY makeup vanity
Add together pocket holes to one side of the four 2×2 pieces @ 14 1/2″. Don't forget to adjust the depth settings on your Kreg Jig for the thicker wood!
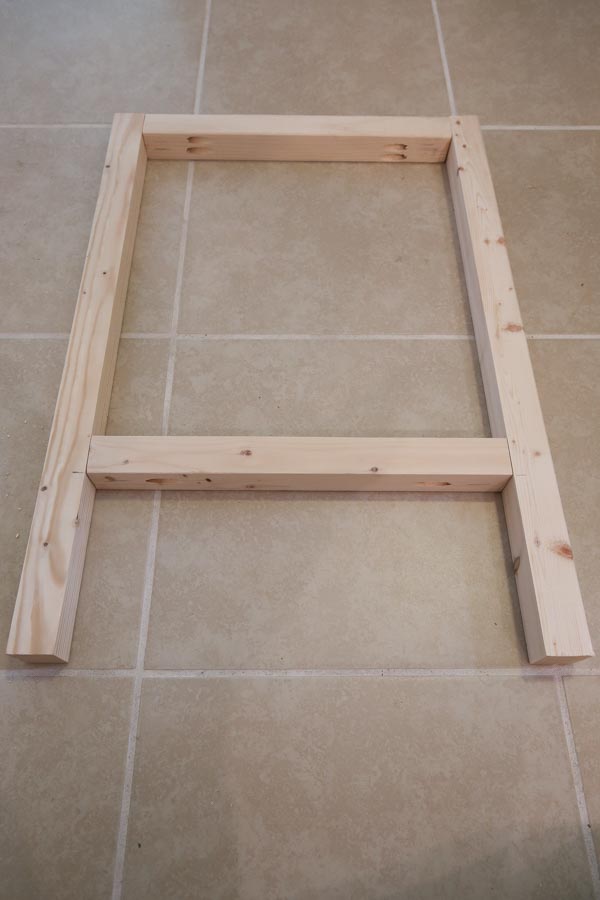
Assemble the two sides of your DIY makeup vanity with forest glue and 2 1/2″ Kreg screws every bit shown in the below photo with two 25″ 2x2s as the sides and two fourteen 1/2″ pieces as the peak and bottom supports. Make sure to attach your bottom lath six″ upward from the bottom of the 2 25″ boards (shown in the second photo below).
Repeat for the other side.
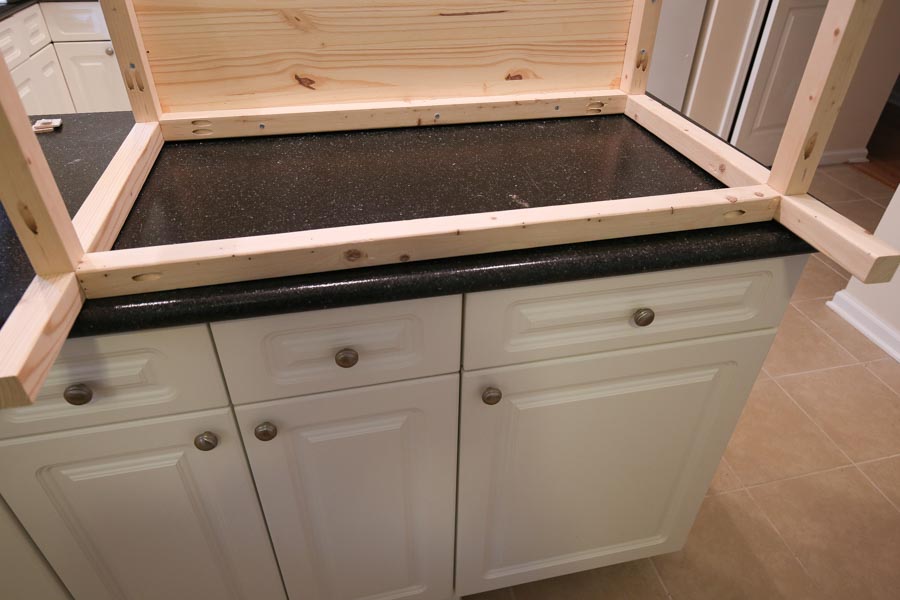
Next, adhere the vanity base frame side to the bottom of the makeup vanity pinnacle using wood glue and 2″ wood screws. Make sure to drill pilot holes kickoff. Repeat on the other side.
Then, add pocket holes to the sides of the two 33″ 2×2 pieces.
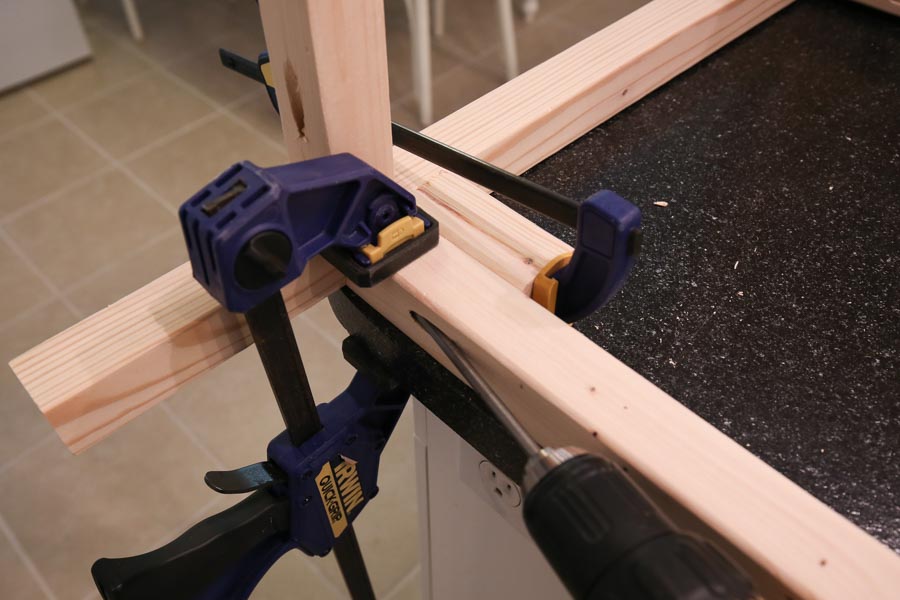
Add together i 33″ board along the top back of the makeup vanity bottom with wood glue and 2″ screws. Then, add 2 ½″ Kreg screws to that same board to connect it to the side legs.
Adhere the other 33″ board with Kreg screws so it aligns with the bottom side boards that are six″ up from the basis.
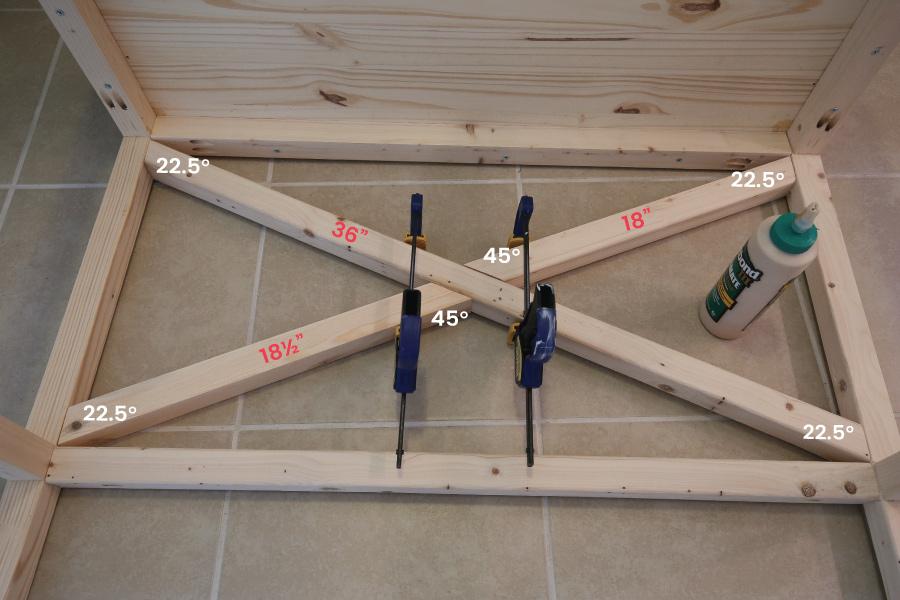
Yay! The structural function of the makeup vanity is at present built. It's fourth dimension to add the X-mode back! Brand the following angled cuts from the remaining 2×2 boards:
- 36″ from long betoken to short betoken with 22.5 degree angles
- 18″ from long indicate to long point with one angle at 22.five degree angle and the other angle at 45 degrees
- xviii i/two″ from long point to long point with one bending at 22.5 degree angle and the other angle at 45 degrees
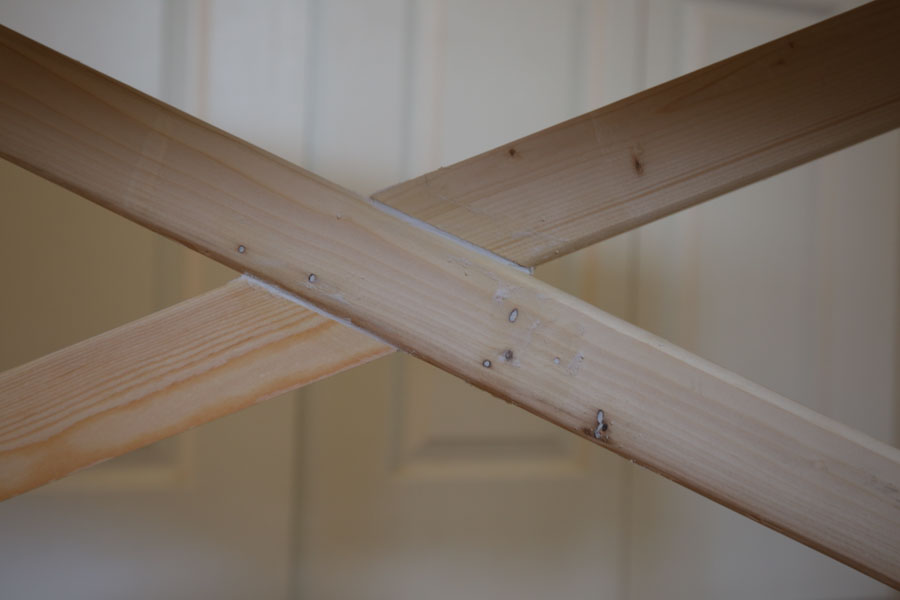
See the below photograph showing how to assemble the Ten-style back. Use wood glue to attach everything together.
Secure the sides of the vanity to the Ten frame with 2″ brad nails from the sides. Allow mucilage to dry out for thirty minutes.

Your makeup vanity build is complete! Yay!

5. Prep for finishing and paint or stain makeup vanity
If you are painting your makeup vanity, go alee and make full any nail holes or gaps in with a lightweight spackle. If you are staining the vanity, you can utilise wood filler or leave as is for a more rustic expect.
Then, sand the vanity where needed and wipe clean. And finish it off with paint or stain! If painting, make sure to prime the wood first.
I chose to paint my piece in Windstorm by HGTV abode for Sherwin Williams. I LOVE the color, it's the perfect soft greyness colour! I did a satin sheen and then it will be more wipeable if makeup or lotion gets on the surface.
Finally, add together your drawer pull hardware! I used these gorgeous contumely drawer pulls. And then savor!


I hung my DIY circular wood mirror to a higher place the vanity and I dearest the combo of the two together! As well, I lined the drawers with this pretty drawer liner.
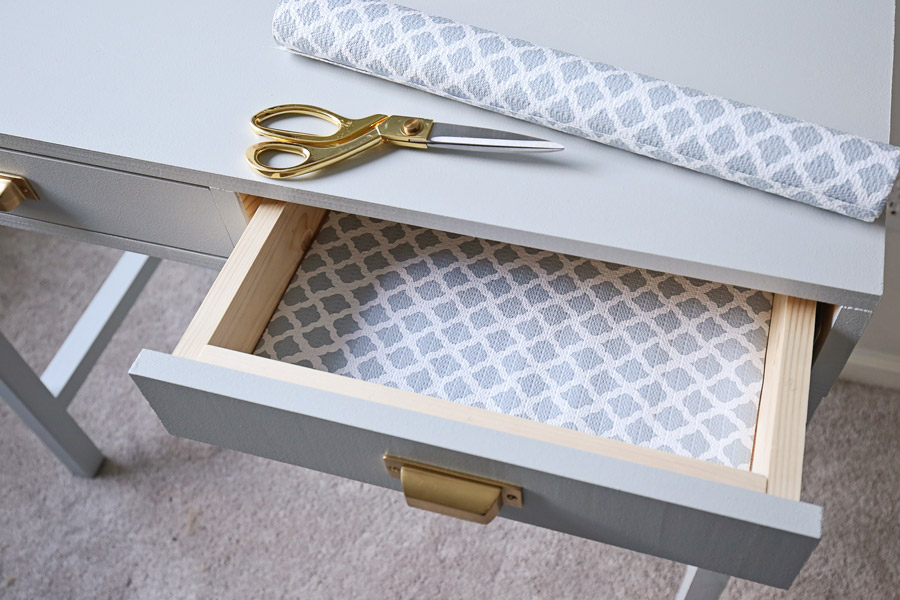
I'k so happy my DIY makeup vanity is finished! At present I don't take to sit down on the floor and do my pilus and makeup anymore! Despite the challenges I faced during building, it was totally worth it!
What do you think?! I hope this tutorial on how to build a makeup vanity has been helpful! I'd beloved to see your version, tag me on Instagram or send me a photo if yous build it!
Follow along on Instagram and Facebook for my latest projects and sneak peeks!

How To Build A Makeup Vanity With Drawers,
Source: https://angelamariemade.com/diy-makeup-vanity/
Posted by: frazerearpot.blogspot.com
0 Response to "How To Build A Makeup Vanity With Drawers"
Post a Comment